So it looks like you’ve finally spent on a new projector screen. Now that you’ve decided where you want to place it, it’s time to grind. You don’t have to hire the services of a contractor to install your projector screen on the ceiling or wall.
You can do it perfectly by yourself. Hanging the projector screen is a breeze; let’s give you a detailed guide on how to hang a projector screen in this article.
Projectors provide bright, clear images, but to be important, you must safely hang the projector screen at the correct height. You can choose to build your projector frames, or you can purchase some frame kits from most hardware stores.
Before mounting a screen, you have a lot of questions in your mind on this topic: On which wall would you like to hang the canvas? Is it difficult to hang the canvas from the ceiling? What tools do you need to fix the canvas?
These and many more questions are answered in our following article so that you have your display in place in no time at all. So let’s start the article.
Ways To Hang Projector Screen From Drop Ceiling?
Some of you really want to know how to hang a projector screen from a drop ceiling. The truth is, when you know how to do it, it’s as simple as a few buildups; otherwise you will have to go through trial and error, which could damage your projector or the ceiling.
But you don’t have to worry because we are going to tell you how to hang a projector from a drop ceiling step by step. The steps are following:
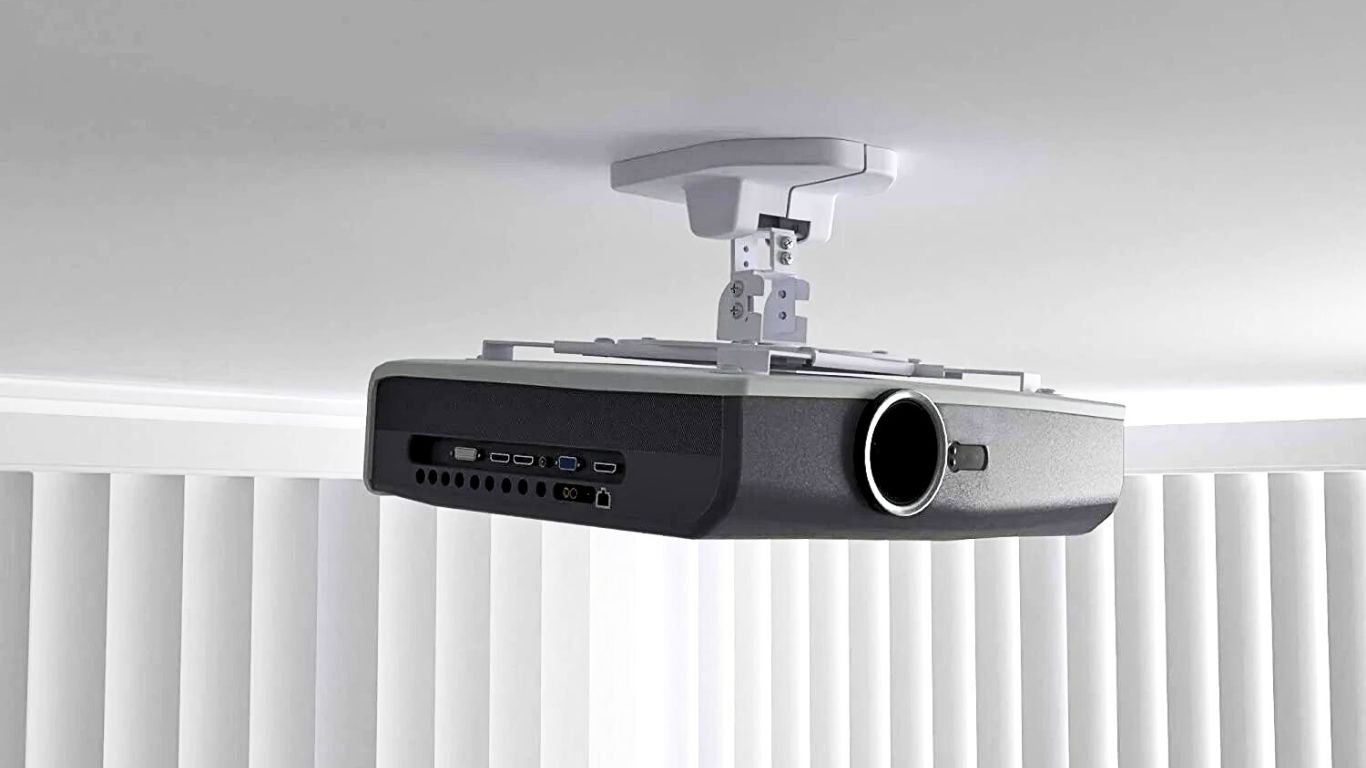
1. Universal Drop Ceiling
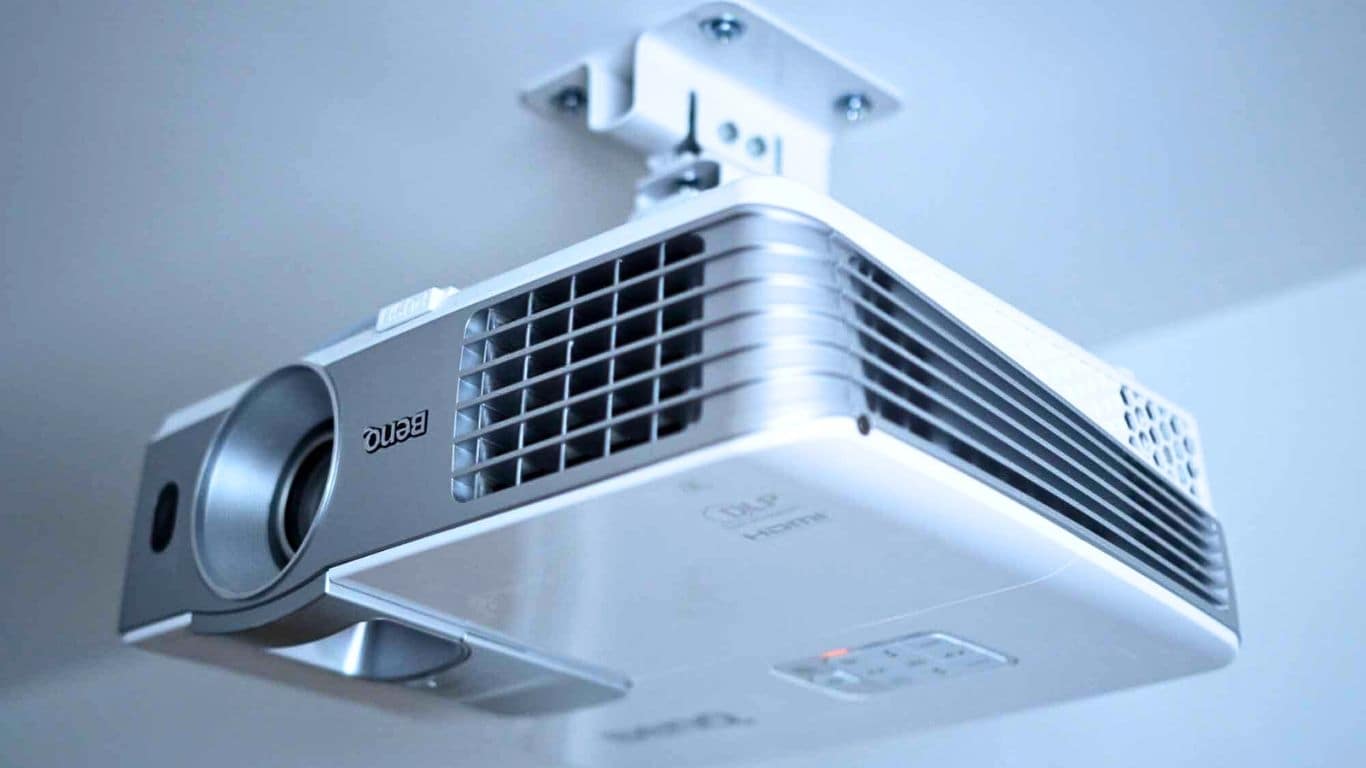
The great thing about the universal drop ceiling is that everything you need is included. It has a ceiling bracket that can be easily attached to the ceiling. There are adjustable brackets in the middle of the mount. (These brackets are usually universal, which means most projectors will fit on them.
The best part is that these brackets are very flexible. It can be tilted from -15 to +15, swiveled from 15 to +15, and rotated 360 °. In addition, you can extend the legs of the stand for large projectors. If you are looking for a good universal false ceiling, we recommend the VIVO universal ceiling bracket.
2. Projector Ceiling Plate
This is somewhat similar to the universal false ceiling, but instead of a complete ceiling bracket, it is just a ceiling plate. To install it, you must place it on top of the area where the projector will be placed. Then screw the plates tight. To secure, make sure the screws engage the bolts. (If there aren’t any studs, you may want to install one in this area.)
The next step is to drill a hole in the ceiling so the pipe can fit through. This tube is the one that connects to the bracket (and the bracket to the projector). Of course, you will need to purchase a bracket with this projector ceiling plate. After that, it’s easy to install the stand and projector from there.
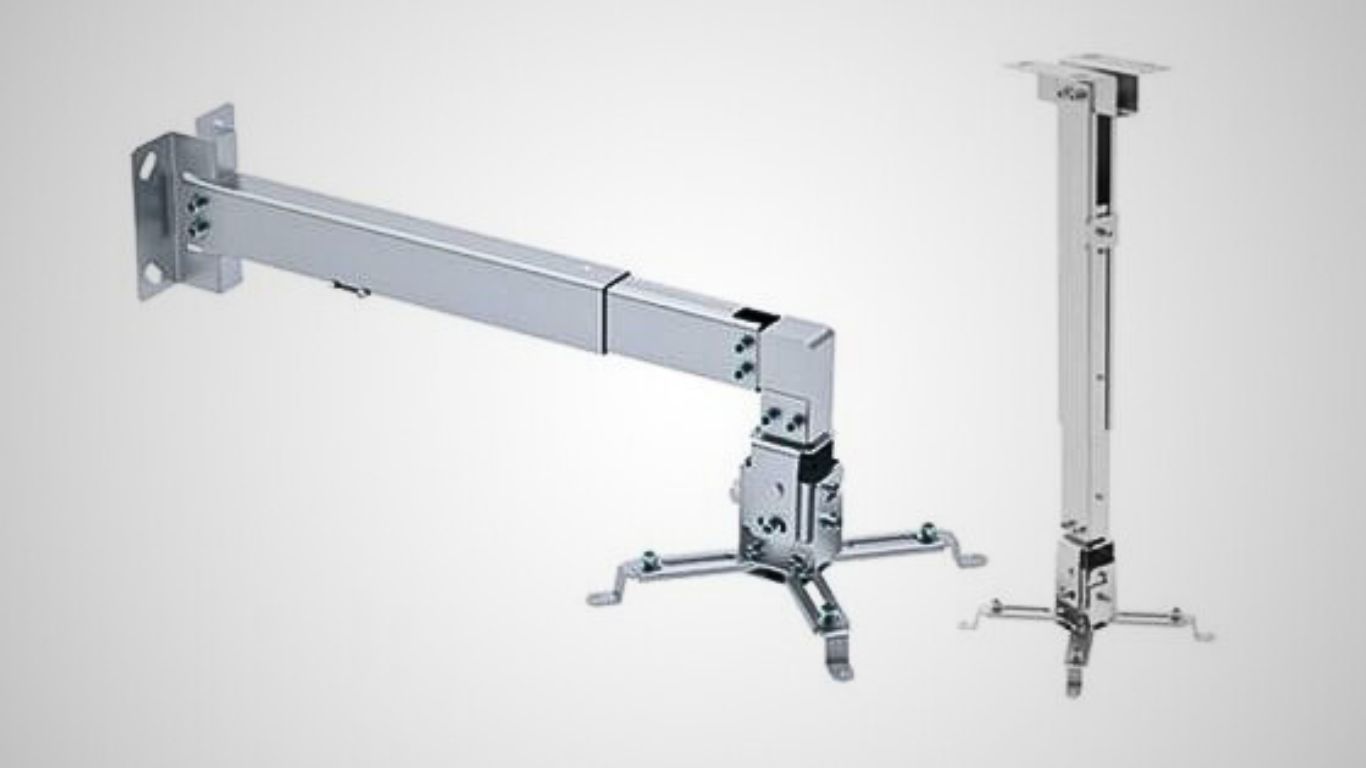
3. Projector Bracket
If the first two options seem too complicated for you, choose a projector mount. With these brackets, all you have to do is screw them to your false ceiling. Again, be sure to screw it into a stud for added security.
You can easily place your projector at the other end of the stand. A good projector bracket we recommend is AMER Projector Mount.
4. DIY Projector Mount
Don’t want to spend on a projector mount? You can build one yourself! To do this, you need:
- Short screws or bolts fit at the bottom of the projector screw holes
- 3″ dry-wall screws
- A screwdriver
- A drill
- A thin piece of wood, plastic glass, or metal plate is about 1/3 of the projector.
- A small chip of wood, plastic glass, or metal plate.
When you have all of that, follow these simple steps:
- Place the wood/glass/metal (whatever you choose) on the bottom of your Make sure it extends about an inch of the back of the projector.
- Drill holes in the wood/glass/metal platform that match the screw holes on the Drill two more into the area that sticks out.
- Use the screwdriver to screw the platform to the projector.
- The next step is to get your little chip/hook and drill a hole near the bottom.
- Screw this chip on the front of your projector.
- Take the first drywall screw and drill into the ceiling, making sure it hits a stud.
- Slide the clip/hook (now attached to the projector) onto this drywall screw to secure the front of the projector
- Finally, use the other 2 drywall screws for the platform to secure the back of the projector to the ceiling.
It’s as simple as that to make your own drop ceiling projector mount. However, keep in mind that this DIY mount won’t give you great angle flexibility.
Can All Projectors Be Ceiling Mounted?
Most projectors on the market can be ceiling mounted, but that isn’t the case across the entire board. There are plenty of portable or mini projectors that cannot be ceiling mounted because they lack the necessary mounting holes and hardware.
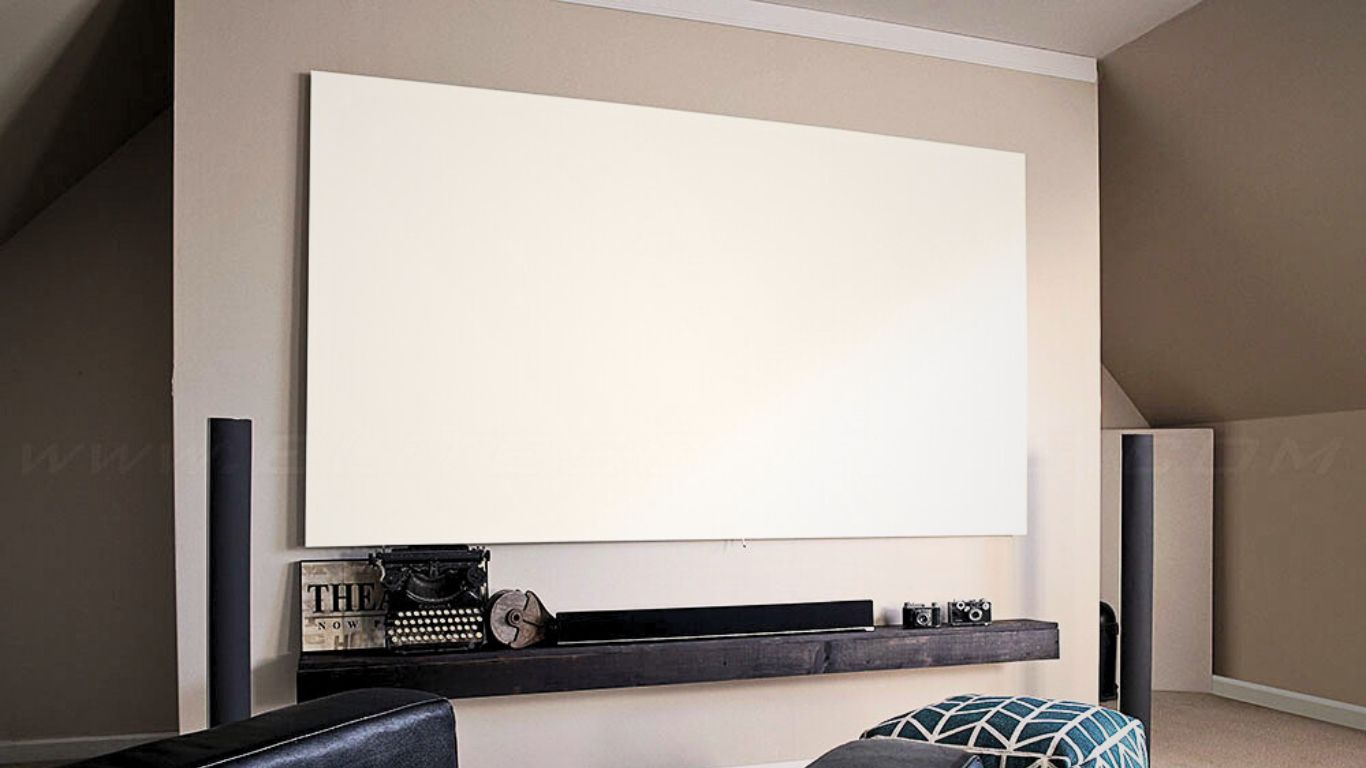
How To Hang A Projector Screen On The Wall
The biggest benefit of hanging your projector screen on the wall is that you can choose how high you want to hang it. Controlling the screen height has several advantages; For example, you can choose whether the projected image should start lower or higher.
When hanging a projector screen on the wall, there are several dimensions to consider, including the size of the room and the size of the screen. Also, read the projector’s instruction manual and check the specific projection distance and vertical offset.
Let’s discuss it stepwise:
- Determine The Ideal Height Position For The Projector
First, you need to consult the projector manual and determine the ideal height position for the projector. Next, you’ll need to use a tape measure to determine the correct height for the wall mounts.
If the screen is large, the wall brackets should be close to the ceiling. Only then can you make the most of the screen size?
- Use Stud Detector
For this step, we need a stud detector. You need to drag the bolt detector to the wall where you want to mount the projector screen. When the doorbell rings, it means you’ve identified part of the stud wall. You need to mark this area with a pencil. After that, you need to measure the width of the projector screen with a tape measure.
Next, you need to determine where to place the second mounting bracket. Then you have to drag the stud detector across the wall in this area as well and again mark the area on the wall where the stud detector beeps.
- Use A Laser Level
The third step is to use a laser level to make sure the pencil marks are drawn right on top of each other. The markings must be parallel to the ceiling. We don’t want the projector screen to hang crooked now, do we?
- Use Your Power Tools
Now is the time for you to start using your power tools. With your screwdriver, you should try to secure the mounting brackets to the wall using the markings you made as guides. When you’re done with that, you’re finally ready to put the screen projector on the wall.
Lift the projector onto the wall brackets and lower it until it clicks into place. Congratulations! You have hung a projection screen on the wall.
How To Mount A Fixed Projector Screen On Drywall?
When mounting a fixed projection screen on drywall, it depends on whether it is a wall mount or a ceiling mount. Either way, the drywall won’t be enough to hold the hooks and bolts in place. You need to place them on the beam or on the solid Wood that supports your wall or ceiling.
Pre-drilling is also required to make it easier to attach these hooks or anchors rather than drilling them into the joists almost immediately. Gradual and methodical drilling is the way to go. Here are the complete steps to mount a fixed screen on drywall.
Predrill Holes
3/16 hole required to drill heavy drywall, double pass; It is ideal for pre-drilling to make correct screw installation easier in the future. Also, it helps you to see if it hits a ceiling bolt or something.
If you’re not ready to decide whether to hit a beam, try a metal wire holder. Use it to stick it into the pre-drilled holes. This gives you a great feel for where to drill or meet the beam.
Hitting Studs
If you’re putting in something heavy like a projection screen, you’d better hit the studs or joists. If you don’t hit bolts, use anchor bolts. If not, you can access the ceiling joists through the storage room and make a cross brace.
Raise & Install The Projector Screen
Hold a second pair of hands to install the screen yourself. You can also use a ladder or even under it. From that point on, you and your accomplice will have to lift the screen to the ceiling.
Now you can use the drill and screw to connect the first end of the screen to the other end of the screen. Now you can easily connect to the other end of the screen. Keep doing the process until the screen is repaired, but do not try to over-tighten the screws.
Mounting Projector To Ceiling Without Studs
Ideally, installing blocking in a large area around where the projector would go would have been the best plan. Even if you have the correct location set up for your current projector, an upgrade at a later time may require a new location, so blocking in a larger area is a good idea.
If you are using two layers of drywall, substitute plywood for the first layer of drywall in the area around the projector location for the blocking. Obviously, you are past that point in time. If you have access to the space above the theater (such as through an attic), you can install blocking from the top side.
If you don’t have access to the space above, your best bet is to install a section of plywood below the drywall. Make it large enough to span two joists. Finish the edges in a way that is appropriate for your style and make it into an inverted “pedestal” to hang the projector from.
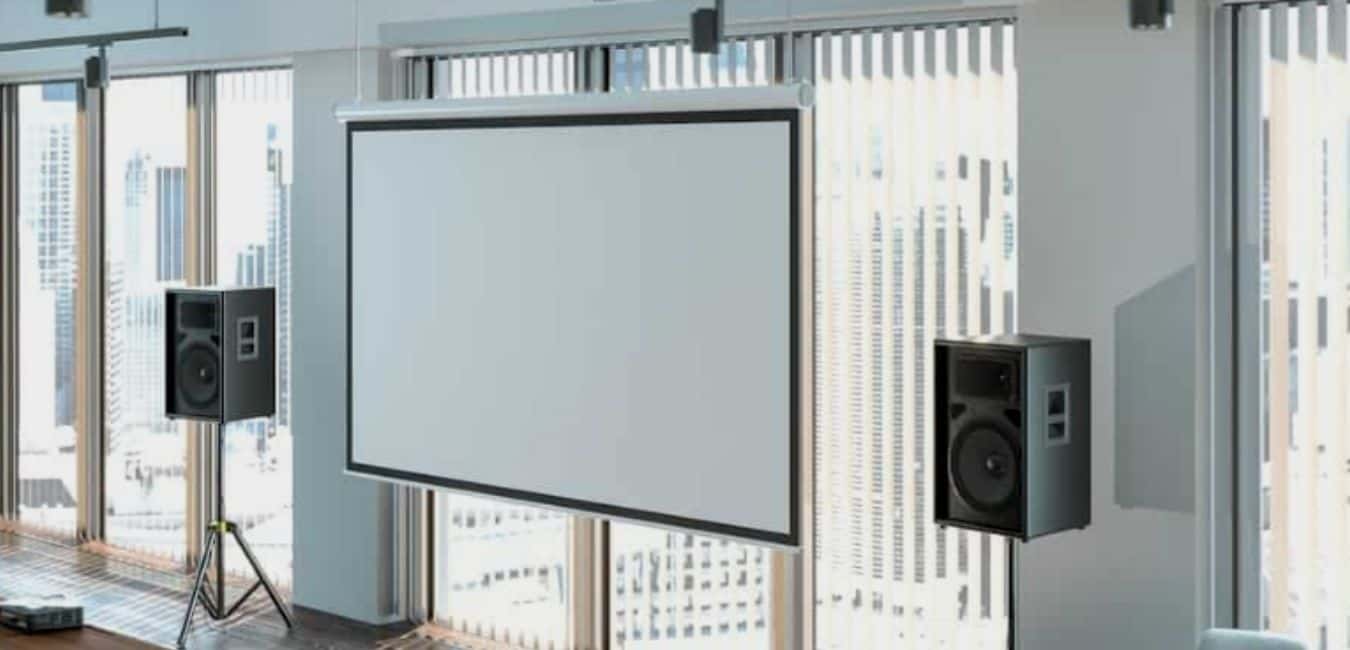
How to Hang a Projector Screen from the Ceiling?
Planning and preparation come first. Consider the size of the screen, the viewing distance, and the illumination while evaluating your location. The ideal height and distance from the seating area can be determined with the aid of precise measurements. As a result, gather the following equipment: a level, a robust ladder or step stool, a stud finder, measuring tape, a pencil, a drill, screws, and wall anchors (if required).
Next, use a stud finder to locate the ceiling joists or support beams. Make a note of where they were placed. Make sure the brackets are level and in alignment before securing them to the joists. These brackets will act as the projector screen’s anchor points.
It’s time to attach the screen itself at this point. Make sure the attachment is safe and secure by carefully following the manufacturer’s directions. Test the stability of the screen after installation and make any necessary modifications. By repeatedly raising and lowering it, you can make sure it works smoothly.
You might also think about hiding the cords for a more professional appearance. There are other options, such as wire channels or cable management systems, that can support maintaining a tidy and expert appearance.
How to Hang a Projector Screen Outdoor
Follow these easy steps to make sure you are not getting stuck anywhere:
- Selecting the Perfect Spot
Finding the ideal location for your outdoor projector screen is crucial. Look for a flat surface that provides a clear view for everyone, ensuring a comfortable seating arrangement. Consider factors like ambient light, nearby power sources, and any potential obstructions that may affect the viewing experience.
- Choosing the Right Screen
Investing in a high-quality outdoor projector screen is essential. Look for screens specifically designed for outdoor use, featuring durable materials and weather-resistant properties. Opt for a screen size that suits your space and desired viewing distance, balancing visibility and immersion.
- Setting Up the Frame
To securely hang your outdoor projector screen, you’ll need a sturdy frame. You can either purchase a portable screen frame or construct one using PVC pipes or metal rods. Ensure the frame is stable and properly anchored to withstand outdoor conditions.
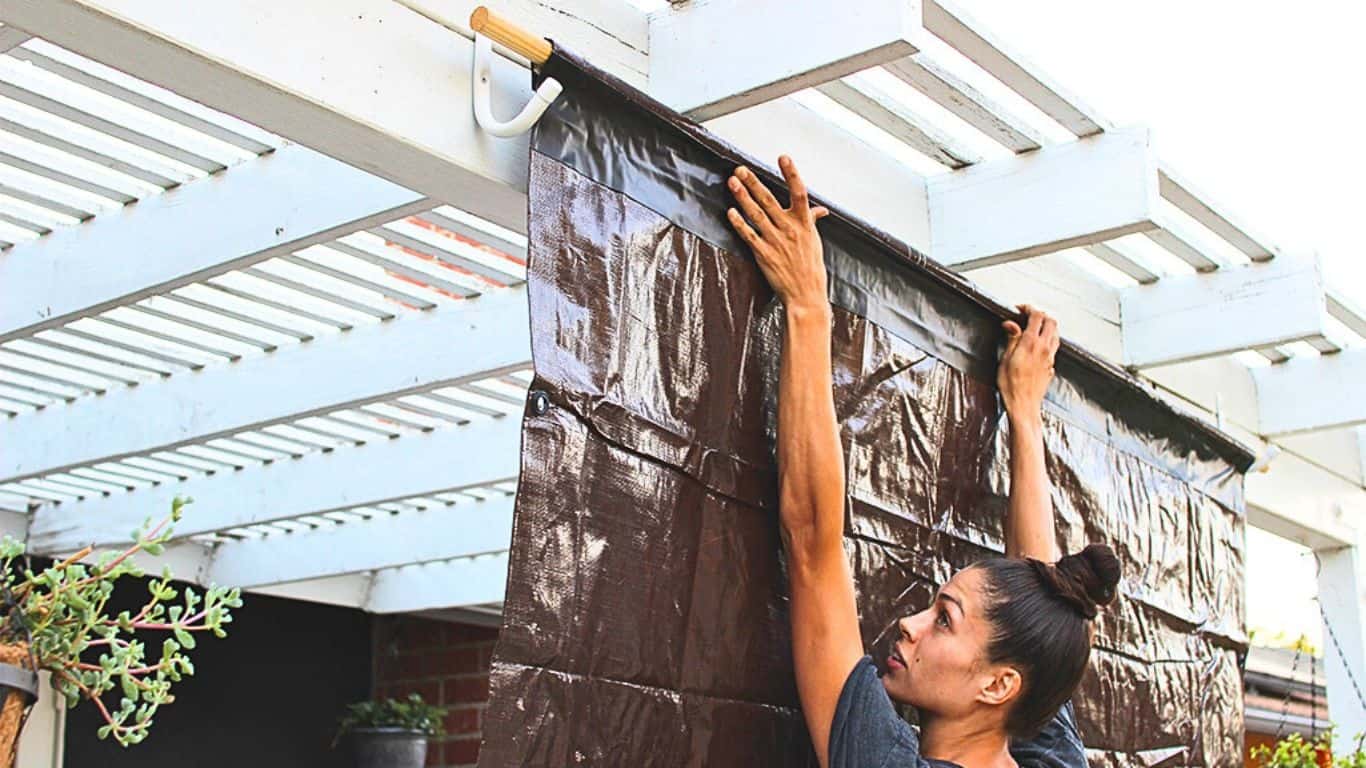
- Mounting the Screen
Attach the screen to the frame following the manufacturer’s instructions. Make sure it is taut and wrinkle-free for optimal image projection. Consider using bungee cords or clips to secure the screen tightly, preventing any movement caused by wind or other elements.
- Audio and Visual Setup
Enhance the cinematic experience by connecting your projector to a quality outdoor speaker system. Opt for wireless options or use extension cables to ensure flexibility in speaker placement. Position the projector at an appropriate distance from the screen and adjust the image size and focus accordingly.
- Creating a Cozy Ambience
Elevate the atmosphere by adding comfortable seating options, outdoor lighting, and cozy blankets or cushions. Set the mood with some background music or create a theme for your movie night, making it a memorable and immersive experience for everyone.
- Weather Considerations
Keep an eye on the weather forecast before planning your outdoor movie night. If rain or strong winds are predicted, it’s best to reschedule or have a backup plan. Ensure your projector and audio equipment are protected from the elements during storage.
How To Hang A Projector Screen – FAQs
Conclusion
Hanging a projector screen is very straightforward. Add this to your shop, living room, or bedroom! It can be said that hanging a screen is too extensive a development, which you can do if you have patience.
You can use these guidelines given in this article in conjunction with your projector’s policy manual to ensure that you mount it correctly.